|
|
|
Radiant PEX Installation DEPTH VS Efficiency in Slab
Last Post 27 Dec 2020 09:30 PM by sailawayrb. 4 Replies. |
Sort:
|
|
 Prev Next Prev Next |
You are not authorized to post a reply. |
|
| Author |
Messages |
 |
seaton

New Member

Posts:8
 |
| 24 Dec 2020 01:03 AM |
|
There are dozens of fancy products like the AMVIC Ampex hydronic mat that have nubs that you place the pex in. Another product ins Nudura Hydro foam.
All of these products seem dead wrong to me. My understanding is that you want the pex 1/2 to 1 in under the top of the slab for optimal performance.
I have read that being at the bottom of the slab could significantly up to 80% cut in performance of systems. Everyone around here is just tying the pex to mesh or rebar.
How do you keep the pex up top where you need it ? I know that placed on rebar that the pipes will get mushed down as the slab is poured. I thought about pouring 3 inches, then lifting in a rebar pex mesh that is pre laid out and capping it with 2 more inches hopefully quick enough that they cure as one.
Design Considerations:
I am in final design stages of a build in Sitka, AK Zone 7. This area doesn't typically ever get below 0F, sits at 40F most of the year, with summer getting up to 65F. A great case for radiant. 120" of rain a year, so very wet.
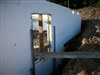
My plan was to put down 4 inches of XPS due to the wet conditions. This slab on grade, and insulated under and around the footings as shown in the attachment |
 Attachment: footings.jpg Attachment: footings.jpg
|
|
|
|
|
|
smartwall

Veteran Member
Posts:1209
|
| 24 Dec 2020 02:34 PM |
|
Things happen quickly during a pour and trying what you want to do would be a potential disaster. Your design with that amount of insulation under the slab should be enough. I would use Form-a-drain with that amount of rainfall, if you can get it. The danger of putting the pex too close to the surface is that you're creating a perfect situation for cracks in your slab. |
|
|
|
|
sailawayrb
Veteran Member
Posts:2283

|
| 25 Dec 2020 11:33 PM |
|
No, placing the PEX on the bottom versus on the top of a 5” thick concrete slab with 2” thick EPS under-slab insulation will only cost you 2.5% efficiency…NOT 80%. We have free DIY hydronic radiant floor heating design software on our website:
https://www.borstengineeringconstruction.com/Hydronic_Radiant_Floor_Heating_Design_Calculator.html
Here’s an excerpt from the associated software instructions that details this subject:
“Before you get too far with hydronic radiant floor system design, you should consider the upward heat effectiveness of the various floor emitters that you may be considering. The upward heat effectiveness percentage of a floor emitter may be calculated as (1 – RELR/2) x 100, where RELR is the emitter efficiency loss ratio and is defined as the R-value above the tube divided by the R-value below the tube.
As a point of mental reference, the emitter efficiency loss ratio is zero if all of the R-value is below the tube and the floor emitter has a 100% upward heat effectiveness. The emitter efficiency loss ratio is 1 if 50% of the R-value is above the tube and 50% is below the tube and the floor emitter has a 50% upward heat effectiveness. This means that only 50% of the heat supplied to the floor emitter actually moves upward into the living space. The other 50% percent of the heat is lost to the ground or space below the floor emitter. Once the emitter efficiency loss ratio becomes or exceeds 2, the floor emitter has a 0% upward heat effectiveness.
Slab-on-Grade, Thin-Slab, Above-Floor Tube & Plate and Below-Floor Tube & Plate floor emitters all having a 12 inch tube spacing provide 98.8%, 89.2%, 62.4% and 40.8% upward heat effectiveness respectively. These values are further degraded if any floor finishing material is used above these floor emitters. For example, using 3/4 inch hardwood flooring above these floor emitters results in 70.3%, 64.6%, 49.9% and 36.3% upward heat effectiveness respectively.
Even the location of where you place the tube in Slab-on-Grade will have an effect on the floor emitter upward heat effectiveness. Concrete is about 0.1 R-value per inch and EPS/XPS is about 5.0 R-value per inch. If you place the tube in the middle of a 5 inch thick Slab-on-Grade, the emitter efficiency loss ratio is (0.1)(2.5”)/[(0.1)(2.5”) +(5.0)(2”)] or 0.024 and (1 –0.024/2) x 100 results in 98.8% upward heat effectiveness. If you instead place the tube on top of the 2” EPS, the emitter efficiency loss ratio is (0.1)(5”)/(5.0)(2”) or 0.05 and (1 –0.05/2) x 100 results in a 97.5% upward heat effectiveness. This is a difference of 1.3% in floor emitter upward heat effectiveness.”
EPS is far greener than XPS and after several years both have the same R-value. You can tie PEX to mesh or rebar and than pull it to mid slab thickness during the pour (mid slab thickness is where mesh or rebar needs to be)…if you have a crew competent to do this. Placing the PEX any higher increases the risk of damaging the PEX when placing interior wall plates and such.
If you live in a wet area, don’t dig… Raise the building above water level with an engineered rock pad. Then construct your footings on top of this pad. Use self compacting pea gravel to fill the void between the pad and where you will construct your floor slab. Put at least 10 mil vapor barrier between the pea gravel and the EPS insulation. We like 4” thick Nudura HydroFoam. Like Smartwall said, install a good drain system to keep water from getting under the slab.
Merry Christmas and Happy New Year to one and all!
|
|
| Borst Engineering & Construction LLC - Competence, Integrity and Professionalism are integral to all that we do! |
|
|
seaton
New Member
Posts:8
|
| 26 Dec 2020 07:10 PM |
|
Thanks a lot, that is why we research. I was looking at tons of articles like this one:
https://www.hpacmag.com/features/hydronics-radiant-floor-tubing-depth-siegenthaler/
But basically based off what your saying, I think my best bet is to just tie my pex to a rebar (I am actually using fiberglass rebar) grid, and put the grid on a couple inch standoffs, and that should be pretty good. I am guessing that the concrete will hold the pex in place so the rebar shouldn't wear holes in the pex. Thanks so much for the info, I will look at the program. I also found some great info on the berkley site http://radiant.cbe.berkeley.edu/ |
|
|
|
|
sailawayrb
Veteran Member
Posts:2283
|
| 27 Dec 2020 09:30 PM |
|
John Siegenthaler’s Modern Hydronic Heating is by far the best reference manual for this subject. Our aforementioned calculator is based on these engineering design principals.
We have not used fiberglass rebar, but we frequently use basalt rebar in our water work projects. It is more like cable than typical rigid steel rebar which allows it to be easily shaped as required. It is about twice the tensile strength and about 1/4 the weight of steel rebar.
Yes, once the concrete cures, your PEX should remain perfectly safe for a couple hundred years…unless you somehow manage to drill into it… Rebar can have sharpies so the real risk is damaging the PEX during the pour. So be sure to keep it pressurized with air (60 PSI is adequate) during and after the pour until the concrete fully cures. And be prepared to quickly make PEX repairs if it is damaged during the pour.
The big advantage of placing the PEX on the bottom of the slab and using a product like Nudura HydroFoam is that the PEX is better protected from getting damaged during the pour. However, you have to be amenable to giving up 2.5% of performance if you are using 2” thick under-slab EPS insulation. If you are planning on finishing your floor by coloring/stamping or polishing them, this is pretty insignificant. This is how we chose to accomplish our personal home and construction photos may be found here:
https://www.borstengineeringconstruction.com/Borst_Residence_Construction_Photos.pdf
We chose to use the 4” thick HydroFoam even when 2” would have been adequate because this results in a 98.8% upward heat effectiveness, i.e., the same effectiveness as if the PEX had been installed in the middle of the slab. I think as long as your finished hydronic radiant floor emitter has 90% or more upward heat effectiveness, you will be very happy with the performance.
Best wishes with your project!
|
|
| Borst Engineering & Construction LLC - Competence, Integrity and Professionalism are integral to all that we do! |
|
|
| You are not authorized to post a reply. |
|
Active Forums 4.1
 |
Membership: |
 |
Latest:
croccohvacusa |
 |
New Today:
0 |
 |
New Yesterday:
0 |
 |
Overall:
35027 |
 |
People Online: |
 |
Visitors:
566 |
 |
Members:
0 |
 |
Total:
566 |
|
|
|