Kipring

New Member

Posts:66
 |
| 04 Nov 2019 10:55 PM |
|
Baptismal by fire seems to be the standard by which we are truly tested.
I think this will be a build thread. I'm not a complete newb with power tools and I have a few dime words.
I'll try to keep this light and to the point so as not to bore.
Experience: - Helped build two homes; one stick another SIP/Timber Frame (as in excavation to end for both) - Mechanically inclined - but not necessarily adept - Project/Product manager 10+ yrs - Stubbornly Determined, Head is Harder than Most Masonry Items
Goal: - Forever home, room for incoming kids, office, and future elderly family
Why: - ICF seems to give a unique opportunity to build your own home with reduced labor - Energy efficient - Concrete - all the goodies (larger windows, more design options, "storm proof") - Running the numbers, building it myself seems the only feasible solution from financial standpoint
Items Completed: - House Plans - Structural Engineering Approval - Initial Cost Estimate - Work Plan w/300+ task list and growing - Storage for materials - Site Power
In Progress: - Fixture Selection - Building Permit Application - Materials Order for Foundation and ICFs - Site Water
- Mental Health Check
Upcoming - Building Foundation - Finding Concrete Crew: have two companies in talks
Current questions:
- Do I need steel form stakes? Or will wood suffice?
- What size wood/steel form stakes are needed for a 10" high foundation - figured 24".
- Should the foundation be keyed? - I do have vertical rebar specced by the Engineer at 16" oc
- Should I have my head examined?
- Bracing.... for a 2 story home....
I'm
afraid I've had some difficulty utilizing the search function on the
website. Please forgive me if some of these questions are rehashed from
older posts. I will be searching and reading as much as possible and
will be trying to figure out what I'm doing wrong when utilizing the
search feature.
And issues submitting posts as well, it seems.
|
|
|
|
|
|
|
Kipring
New Member
Posts:66
|
|
Kipring
New Member
Posts:66
|
|
smartwall

Veteran Member
Posts:1197
|
| 04 Nov 2019 11:45 PM |
|
Wood or steel? Depends on soil. If you can drive a wood stake in, there you go. Length should be enough to hold the footing form in place. I would key the footing, it's a little insurance without much effort. Ideal house design for icf. Lastly, try and find or buy Zonts and Zuckles the're ideal for your situation. Use them as long as you need then box them up and put them on line. Sounds like your build will take some time. A little tip would be to get some mistake paint from the homarama and paint the 2xs that you are going to use. It will keep your 2xs from twisting. Don't forget the ends. They check first with moisture. |
|
|
|
|
Kipring
New Member
Posts:66
|
| 09 Nov 2019 04:30 AM |
|
Was looking for wood stakes to save on the expense but willing to pony up for steel if it meant getting the highest accuracy for the foundation.
I'll check out the paint.
I've seen a lot of people endorse the Zonts/Zuckles - I've been leaning that way, given my application.
Thank you,
~Kip |
|
|
|
|
Kipring
New Member
Posts:66
|
| 21 Nov 2019 08:44 PM |
|
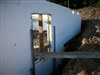
Perimeter dug. Now scooping out the insides.
Utilized a simple mason fence to estimate where I would like the front door to sit, estimating a few steps and calculated down how far to dig in order to achieve selected height.
|
|
|
|
|
Kipring
New Member
Posts:66
|
| 21 Nov 2019 08:50 PM |
|
Items Completed: - Continued Work Plan Grown to 325 line items - Fixture Selection, Quotes
- ICFs Ordered and Incoming - Material Order for Foundation
In Progress: - Switch and Outlet Placement
- Building Permit Application - Pressure Test Site Water
- Mental Health Check
- Dig out and grade foundation
Upcoming - Building Foundation - Finding Concrete Crew: have two companies in talks |
|
|
|
|
Kipring
New Member
Posts:66
|
| 02 Jan 2020 09:25 PM |
|
Items Completed: - Continued Work Plan Grown to 350 line items - Fixture Selection - Purchasing Items
- ICFs Received - Pressure Test Site Water - Minor Leak to be Fixed - Initial Excavation
In Progress: - Switch and Outlet Placement
- Building Permit Application - Mental Health Check
Upcoming: - Order Materials for Footings - Compact and Gravel Foundation - Double check dimensions
- Finding Concrete Crew: have two companies in talks
Items Learned: - Think about how much dirt you will be removing, find a place for it - now triple the space you think it will need. I assumed doubling the space I would need might be enough but it wasn't. Uncompacted dirt takes up way too much room. If you are storing some of the earth on site, triple the amount of space you think it would require to 'house' it. - Plan for water drainage immediately. I figured on digging out my drain lines after completing the foundation dig - nope. Do your drainage and plan for it as you begin digging. This could be a serious issue if you plan too late and have to dig somewhere that is now blocked by dirt, materials, etc.
|
|
|
|
|
Kipring
New Member
Posts:66
|
| 13 Nov 2020 02:44 AM |
|
Been a while, afraid life makes things
take much longer than anticipated (duh). New baby, lost the best dog in
the world, new job, and lots of rain delays.
Items Completed: - Foundation - First ICF Wall (Pre-Pour)
- Bracing - Bucks
In Progress: - Secure Bucks
- Penetrations
- Master Partition - Garage Stem Wall Partition - Final Bracing
Upcoming: - 1st Pour - Sono Tubes
- Curtain Drain
- Crawl Space Grading
Items Learned: - Add trenches to your excavation/foundation areas - Never agree to someone else's timeline - especially a sub; unless you are already going to be waiting on them. If you fail to make it, you burn a bridge. - Pouring, screeding, and plopping in vertical rebar for a foundation is not a one man job.
-
Don't do this yourself. I'm an idiot and I would never recommend this
to anyone - have a partner, a friend, a handyman; anyone to help you. As
for me, I'm going to back to work - lots to do.
Here is a photo montage from June til Nov.
June
|
|
|
|
|
Kipring
New Member
Posts:66
|
| 13 Nov 2020 02:51 AM |
|
Still June
After a few weeks of dry weather:
Compacted the whole area with a jumping jack after I trampled it with a skidsteer.
|
|
|
|
|
Kipring
New Member
Posts:66
|
| 13 Nov 2020 02:53 AM |
|
Added Gravel threw in some wood, stakes and rebar.
|
|
|
|
|
Kipring
New Member
Posts:66
|
| 13 Nov 2020 02:54 AM |
|
Add some movie magic and waaa la
|
|
|
|
|
Kipring
New Member
Posts:66
|
|
Kipring
New Member
Posts:66
|
| 13 Nov 2020 03:02 AM |
|
Starts looking like the inside of a refrigerator, real fast.
|
|
|
|
|
Kipring
New Member
Posts:66
|
|
Kipring
New Member
Posts:66
|
| 13 Nov 2020 03:07 AM |
|
Things are slowing down now from Sept till Nov the progress has slowed, no longer is it just throwing up blocks and bracing.
It's closing the common seams, figuring out where the joists and ledger boards will go, cut outs for windows, doors, etc.
|
|
|
|
|
Smart Shop
New Member
Posts:65
|
| 14 Nov 2020 11:37 PM |
|
I would love to see your progress but I just see a minus symbol where you have linked files. |
|
|
|
|
Kipring
New Member
Posts:66
|
| 18 Nov 2020 04:34 PM |
|
Thank you for letting me know, are they showing now?
|
|
|
|
|
Smart Shop
New Member
Posts:65
|
| 18 Nov 2020 11:32 PM |
|
I see them now.
It looks good. I hope you have a good pour to fill those up. |
|
|
|
|
newbostonconst

Advanced Member
Posts:736
|
| 19 Nov 2020 11:20 AM |
|
Very cool....Nice....Thanks for sharing.... |
|
| "Never argue with an idiot. They will only bring you down to their level and beat you with experience." George Carlins |
|
|
smartwall
Veteran Member
Posts:1197
|
| 19 Nov 2020 05:02 PM |
|
With the zuckles, I would use shorter 2x's. If you need to adjust the wall the 2x's of that length will bend. It looks like a 8' would have been better. Also did you leave the footing forms in place? |
|
|
|
|
Kipring
New Member
Posts:66
|
| 23 Nov 2020 01:43 PM |
|
Posted By smartwall on 19 Nov 2020 05:02 PM
With the zuckles, I would use shorter 2x's. If you need to adjust the wall the 2x's of that length will bend. It looks like a 8' would have been better. Also did you leave the footing forms in place?
Thank you for the suggestion. I have
only just now made it far enough along to begin adjusting the walls
plumb. They did fine, but to your point with the concrete they will
probably bend.
I
reached out to the GC that I've contracted to do the first ICF pour and
he feels confident they will be fine (he does ICFs for a living).
I'll be sure to have some 2x on hand to brace the long turnbucks in the middle if they begin to bough. |
|
|
|
|
sailawayrb
Veteran Member
Posts:2272

|
| 23 Nov 2020 05:15 PM |
|
Not obvious to me from photos, but I trust you have placed chases for all your required electrical and plumbing penetrations. It isn't easy to make penetrations after the pour... |
|
| Borst Engineering & Construction LLC - Competence, Integrity and Professionalism are integral to all that we do! |
|
|
Kipring
New Member
Posts:66
|
| 24 Nov 2020 05:27 PM |
|
Posted By sailawayrb on 23 Nov 2020 05:15 PM
Not obvious to me from photos, but I trust you have placed chases for all your required electrical and plumbing penetrations. It isn't easy to make penetrations after the pour...
I would hope they aren't
obvious - they aren't there. On the to-do list, I just mapped them out
this past weekend and will be setting them in in a few more days. |
|
|
|
|
Kipring
New Member
Posts:66
|
| 22 Dec 2020 02:39 AM |
|
Pour went great!!!
The Zonts/Zuckles worked better than I had hoped, the windlocked screws held in the bucks just fine, and the 14' 2x4s didn't budge.
There were two issues: 1) Little oozing at one section at the bottom row of one block - not sure why, but no lifting 2) The Bucking material is a little smaller than the openings of the blocks so when you screw the bucks in - it "pinches" the foam a bit. Caused an issue where there were two windows 9' apart that looks to have a slight bow.
Lessons Learned:
1) Potentially use some shims or spray foam around the bucks to not pinch the foam to the bucks? 2) Despite the 14' turnbuckles handling the pressure - I agree with smartwall and will be cutting them down to increase their rigidity on the next pour.
|
|
|
|
|
Kipring
New Member
Posts:66
|
| 22 Dec 2020 02:48 AM |
|
Still kind of on cloud nine - this has taken a long time to get concrete in the forms and feel like the Earth isn't trying to swallow up the build.
Next Steps: - Take down and store bracing.
- Water membrane.
- Dimple fabric/drainage membrane.
- Curtain/French Drain
- Crawl space pour and pillar pour
- LVL and Joist Installation
|
|
|
|
|
Kipring
New Member
Posts:66
|
| 26 May 2021 01:48 AM |
|
Moving along with the below grade water proofing.
Odd feeling having a crew do the pour but super thankful - couldn't have done this on my own at all. Only piece I had to worry about was the vapor barrier.
|
|
|
|
|
Kipring
New Member
Posts:66
|
| 26 May 2021 01:58 AM |
|
Always nice to watch a group move efficiently and effectively.
|
|
|
|
|
Kipring
New Member
Posts:66
|
| 21 Jun 2021 05:57 PM |
|
Trying to pick up the pace - found a contractor to do the i-joists and subfloor. Just have to complete a punch list:
- Install LVLs
- Install Girder Supports
- Install Girders
|
|
|
|
|
Kipring
New Member
Posts:66
|
| 21 Jun 2021 06:04 PM |
|
Built Girder Supports for the Termination of Each Girder out of Rectangular Steel Tubing
|
|
|
|
|
Kipring
New Member
Posts:66
|
| 21 Jun 2021 06:11 PM |
|
Okay so a couple of Lessons Learned for ICFs and Simpson ties - I did drill out the mounting locations in the LVL (per some installers recommendations)
- No matter what you do - you WILL break screws (about 1.5 per mounting surface)
- Start at the lower holes and work your way up, don't jump around causes the LVL to snap and increases the change for a screw break
- LVLs are heavy - don't do this alone... any of this.... just ... don't be an idiot... like me
|
|
|
|
|
smartwall
Veteran Member
Posts:1197
|
| 22 Jun 2021 01:48 PM |
|
Try bracing from the outside for a foundation or crawl space. It's easier and you could have done the floor when you poured the walls. Also I switched to Watkins and Burmon hangers. The Simpson hangers were great when they came out 15 years ago but like all things the other two are better, especially the Burmon. No ledger needed just cast the hangers into the wall and hang the joist from them. |
|
|
|
|
Kipring
New Member
Posts:66
|
| 22 Jun 2021 03:22 PM |
|
Yes, a couple of things I would have done differently - Monopour foundation and crawlspace wall
- Not used Simpson ties
Thank you for the suggestion on Watkins - I think I've seen these and leaning toward their mounts.
I haven't seen Burmon - I'll definitely take a look.
|
|
|
|
|
smartwall
Veteran Member
Posts:1197
|
| 22 Jun 2021 03:43 PM |
|
The Burmon are an improvement over the Watkins. Both are far superior to the Simpson. The Zonts and Zuckles are the reason I pour the footing, wall and floor in one pour. You can easily set up your bracing outside. It's hard to get people to think of a better way when it's always been done one way. |
|
|
|
|
Kipring
New Member
Posts:66
|
| 27 Oct 2021 02:24 AM |
|
Hired a sub to put in the ijoists - didn't trust myself
|
|
|
|
|
Kipring
New Member
Posts:66
|
| 27 Oct 2021 02:25 AM |
|
I did glue and screw in the subfloor.
|
|
|
|
|
Kipring
New Member
Posts:66
|
| 30 Oct 2021 05:04 PM |
|
Finished the subfloor.
Worked on the foundation drain to get ready to backfill the garage.
|
|
|
|
|
Kipring
New Member
Posts:66
|
| 30 Oct 2021 05:11 PM |
|
Finishing up the backfill
|
|
|
|
|
Kipring
New Member
Posts:66
|
| 30 Oct 2021 05:12 PM |
|
Crazy what the Gov makes you get a permit for - less than 10' of pipe - had to get a plumbing permit. For the dog wash and washing machine.
|
|
|
|
|
Kipring
New Member
Posts:66
|
| 30 Oct 2021 05:17 PM |
|
Got the same crew that did the crawlspace to do the garage slab.
|
|
|
|
|
Kipring
New Member
Posts:66
|
| 30 Oct 2021 05:20 PM |
|
Almost ready for the pour:
|
|
|
|
|
smartwall
Veteran Member
Posts:1197
|
| 31 Oct 2021 01:22 PM |
|
A tip. If your build is going to take you awhile, use some wrong color house paint from the homarama on your 2x4 bracing. It will keep from twisting. Same thing for the deck sheathing. |
|
|
|
|
Kipring
New Member
Posts:66
|
| 10 Nov 2021 02:20 PM |
|
Oye, thank you. Would have used this tip sooner.
|
|
|
|
|
smartwall
Veteran Member
Posts:1197
|
| 10 Nov 2021 11:57 PM |
|
I've been throwing it out there for years, ever since I began using Zonts and Zuckles. With Z&Z's you can brace from the outside which leaves the inside free to pour your rat slab at the same time as your walls. Saves time and money. One pump rental for the whole thing. For the floor system I use either Watkins hanger or the Burmon hangers. Easier than the Simpson system. |
|
|
|
|
sailawayrb
Veteran Member
Posts:2272
|
| 11 Nov 2021 02:25 AM |
|
My tip...listen to Smartwall... |
|
| Borst Engineering & Construction LLC - Competence, Integrity and Professionalism are integral to all that we do! |
|
|
smartwall
Veteran Member
Posts:1197
|
| 15 Nov 2021 12:06 AM |
|
My wife doesn't . |
|
|
|
|
sailawayrb
Veteran Member
Posts:2272
|
| 15 Nov 2021 07:03 PM |
|
You had best listen to your wife...happy wife...happy life! |
|
| Borst Engineering & Construction LLC - Competence, Integrity and Professionalism are integral to all that we do! |
|
|
smartwall
Veteran Member
Posts:1197
|
| 16 Nov 2021 05:36 PM |
|
That's what I've been told. |
|
|
|
|
newbostonconst
Advanced Member
Posts:736
|
| 17 Nov 2021 11:50 AM |
|
I call BS....It is a trap....it is the wife's job to be happy not mine... |
|
| "Never argue with an idiot. They will only bring you down to their level and beat you with experience." George Carlins |
|
|
smartwall
Veteran Member
Posts:1197
|
| 17 Nov 2021 04:23 PM |
|
Touche'. I agree. |
|
|
|
|
Kipring
New Member
Posts:66
|
| 02 Mar 2023 09:40 PM |
|
It's been a long while, but still at it.
The horrible contractor that I was utilizing for the pours and agreed to do the final lift abandoned the project. I had to finish the 2nd floor myself and do the pumping myself. Lots to post but now I feel I'm finally at a good place in the project.
|
|
|
|
|
Kipring
New Member
Posts:66
|
| 02 Mar 2023 10:04 PM |
|
Setting in the beam for the 2nd Floor
 |
|
|
|
|
Kipring
New Member
Posts:66
|
| 02 Mar 2023 10:07 PM |
|
Setting up the i-joists.  |
|
|
|
|
Kipring
New Member
Posts:66
|
| 03 Mar 2023 03:02 AM |
|
Master Bedroom Framing  |
|
|
|
|
Kipring
New Member
Posts:66
|
| 03 Mar 2023 03:03 AM |
|
2nd Floor subfloor down  |
|
|
|
|
Kipring
New Member
Posts:66
|
| 03 Mar 2023 03:04 AM |
|
Window Bucks and 2nd Floor Stacking 
 |
|
|
|
|
Kipring
New Member
Posts:66
|
|
Kipring
New Member
Posts:66
|
|
Kipring
New Member
Posts:66
|
| 03 Mar 2023 03:27 AM |
|
I don't have many good pictures of pump day.... it was close to a failure. My fault entirely from pushing each weekend trying to do as much as possible without slowing down more often to think through. Had a serious blowout at the INSIDE corner of the 45 degree, going into the master bedroom. I had screwed the trusses into the form work but didn't add additional support between the webs of the trusses. About a yard of concrete, yes almost a full yard poured out. It was a mess to clean but it was salvaged and used as part of the patio pour. After that issue the windows were the next to...ooze... just those three large openings so close together, they didn't have enough connections between the buck and the form so the concrete oozed a bit. We paused and shot several more screws and a couple of 2x4's across them just to be safe and then finished the pumping. Oh and that was only half of the issues. The boom pump operator was older... eyes weren't too good... so while I was up high holding the tube, he managed to yank it out of my hands more than a few times and pepper me with concrete. Guys that have done this know what I mean when I say that stuff hits you... it isn't water (duh) and it has force coming out. Not exactly fun when you are up on scaffolding getting slapped in the face with a tube of crete. And the icing on the cake... did I mention the boom operator's eyes weren't too good? He managed to hit the power line and generate arcs all around the boom pump, creating several fires. After we doused the fires with dirt and thought the show was over, the operator was looking carefully over his rig. BOOM, one of his tires he was standing near burst, sending him flying several feet. His arm was cut up from the rubber and steel, he couldn't hear, and he looked like he had just climbed down a chimney. Once we were able to ascertain he was going to be okay and he gathered his wits - he quit. This was the second time in as many years hitting a power line - he thought God was letting him know, it was past time to retire. I think he was right.     |
|
|
|
|
Kipring
New Member
Posts:66
|
|
Kipring
New Member
Posts:66
|
|
Kipring
New Member
Posts:66
|
| 07 Mar 2023 05:07 PM |
|
Just got most of the membrane installed and here we are.   |
|
|
|
|
Kipring
New Member
Posts:66
|
| 07 Mar 2023 05:14 PM |
|
Current Items:
- Contracting the Roofer
- 2 weeks windows arrive
- Cleaning Openings
- Applying Seam Sealer
- Pouring Front and Rear Door Sills
- Installing Hurricane Ties
- Cleaning |
|
|
|
|
EmilyB
New Member
Posts:12
|
| 13 Mar 2023 08:04 PM |
|
Wow, what an amazing journey! It's looking really good so far. I hope you keep us updated, I'd love to see the finished product! I'm in the process of building a new, sustainable home that I can rent out as temporary accommodation. With ZERO building experience and knowledge, I've found the whole process extremely difficult. One builder tells me one thing, another builder tells me something totally different. I don't know which way's up anymore! After months of deliberation, I've decided to make things as simple as possible and build a tiny home instead. It was this article that steered me in this direction https://podlife.co.nz/airbnb-invest...iny-house/. It looks like the most viable option, and it's far more affordable than anything I've checked out so far! I'd love to know you're thoughts seeing as you're deep into the build process yourself. |
|
|
|
|
Kipring
New Member
Posts:66
|
| 22 Mar 2023 02:24 PM |
|
Posted By EmilyB on 13 Mar 2023 08:04 PM
Wow, what an amazing journey! It's looking really good so far. I hope you keep us updated, I'd love to see the finished product!
I'm in the process of building a new, sustainable home that I can rent out as temporary accommodation. With ZERO building experience and knowledge, I've found the whole process extremely difficult. One builder tells me one thing, another builder tells me something totally different.
I don't know which way's up anymore!
After months of deliberation, I've decided to make things as simple as possible and build a tiny home instead. It was this article that steered me in this direction https://podlife.co.nz/airbnb-invest...iny-house/. It looks like the most viable option, and it's far more affordable than anything I've checked out so far!
I'd love to know you're thoughts seeing as you're deep into the build process yourself.
That wouldn't be my wheelhouse - I'm building a home for living not utilizing for income or resale. Very different objectives regarding size, quality, materials, etc. |
|
|
|
|
Kipring
New Member
Posts:66
|
| 29 Sep 2023 07:52 PM |
|
Finally able to return the scaffolding, after months and months on rent....

Purchased some red cedar to build the front awning.

They were all rough sawn. Power and hand planed them down with a final pass with the sander.
 |
|
|
|
|
Kipring
New Member
Posts:66
|
|
Kipring
New Member
Posts:66
|
| 29 Sep 2023 08:14 PM |
|
You know what goes next.

 |
|
|
|
|
Kipring
New Member
Posts:66
|
| 29 Sep 2023 08:20 PM |
|
So, another learning tip for those reading. Go a full INCH bigger on your bucks for all openings. I went a half inch on some openings and that was not the best decision. Had to utilize a power planner and grinder to open up some of the openings for the windows.
While that was a pain - all of the openings were super flat for some reason.

Went with the Prosoco stuff on the windows. Glad I did. I've used the blue "goo" now and the red "goo". Red is better. I've also experimented with both the "paint grade" and tool grade Prosoco flashing. The tool grade is the way to go, the "paint grade" is more like smearing honey than painting. 
 |
|
|
|
|
Kipring
New Member
Posts:66
|
| 29 Sep 2023 08:26 PM |
|
Biggest thing I can say about the window install - if you can get your buck to go across the entire width of the ICF - do it. Much easier to install. I used mineral board for mine and they don't produce anything larger than 8.5".

Installation:
- seam sealer (fiber goo)
- Liquid flash
- Install of Window (used metal brackets - easier IMO)
- Latex Caulk on fins
- Liquid flash over top to finish up

 |
|
|
|
|
Kipring
New Member
Posts:66
|
|
Kipring
New Member
Posts:66
|
|
Kipring
New Member
Posts:66
|
| 29 Sep 2023 08:35 PM |
|
Getting closer to framing inspection!

Garage Wall
 |
|
|
|
|
Kipring
New Member
Posts:66
|
| 29 Sep 2023 08:36 PM |
|
Prepping for Front Door Entrance, final lift.


|
|
|
|
|
Kipring
New Member
Posts:66
|
|
Kipring
New Member
Posts:66
|
| 29 Sep 2023 08:42 PM |
|
Currently getting quotes on Spray Foam for the roof insulation. Until I settled on a contractor, working on final items for inspection, and sealing up the rafter sections with polyiso
 |
|
|
|
|
Kipring
New Member
Posts:66
|
| 29 Sep 2023 08:47 PM |
|
Best part - took the wife to the site to show her for the THIRD time since starting the build.
First time I took her to the future home - she cried. We were standing in mud, in the middle of a big pit, as I had just finished the excavation.
Second time was after the first floor was just finished. I was thinking - this will really help her show that we are moving forward, all the work put in had a real purpose. Her response "Is this it??". Not exactly what I wanted to hear.
This time, she finally smiled. She could see light at the end of the tunnel and she was able to figure out her kitchen layout, finalize the size of the cabinets, and kitchen island. We can finally order the cabinets and start thinking about getting a plumber in while I work on supply and electrical. |
|
|
|
|
Kipring
New Member
Posts:66
|
| 27 Mar 2024 09:02 PM |
|
Insultation in the rafters/exterior wall

Installation of the first panel (sub)

Window Dressing for Front Porch
 |
|
|
|
|
Kipring
New Member
Posts:66
|
| 27 Mar 2024 09:05 PM |
|
Flooring the Attic

Building Mounting Blocks for Exterior Fixtures and Penetrations

Installing Support for Large Wall Mounts
 |
|
|
|
|
Kipring
New Member
Posts:66
|
| 27 Mar 2024 09:08 PM |
|
Spray Foam Done!

Last Min Adjustment - Walk in Shower Prep

More Mounting Blocks
 |
|
|
|
|
Kipring
New Member
Posts:66
|
| 29 Mar 2024 01:53 PM |
|
Lessons Learned from Last Update
1 :: Cameras
Make sure you have cameras up. Had a worker for a contractor steal from me. Thankfully, he was a career criminal and had taken 50k worth of items across multiple properties and other businesses. This made him a prime target for my local county and two other municipalities. However, another city police were one of the "more enlightened" sort and decided he should be allowed to take some of his stolen merchandise before the warrants went into effect.
Simply - he has multiple warrants out for his arrest but has some of the stolen property in his possession while he runs.
Cameras - make sure you have cameras setup, it can and could be the difference between a major headache and a colossal loss.
2 :: Documentation
Probably the most overlooked item that I have yet to see on any post or vid - documentation. Documentation that you need to keep for inspections, truss layout, reinforcement schematics with structural engineering signoff/seal, validation of performance factors. Make sure you are keeping up with your documentation and storing them appropriately.
Sorry no story here but I need to do better about storing the documents.
3 :: Drainage Membrane/Below Grade Drainage Planes
They do nothing. They are an oversold piece of merchandise that only does one thing - protect your below grade water sealing membrane from damage while you backfill. That's it. Don't waste money on these, find something cheap to protect your water membrane and move on.
4 :: Exterior
With ICF there are several major brands that will not warranty or even sell some products for ICF applications. I'm dealing with multiple contractors who are struggling to find vendors who will warranty and one who won't even sell the materials due to the construction being ICF. I'm now faced with the option of installing what we want without a warranty or expending many more resources for receiving a warranty.
|
|
|
|
|
smartwall
Veteran Member
Posts:1197
|
| 29 Mar 2024 02:42 PM |
|
Point number 3. Use Form a Drain and cover your membrane with fan fold insulation that they use under vinyl siding. It's cheap and effective. I've had idiots backfill with shale and wonder why they had a leak. |
|
|
|
|
Kipring
New Member
Posts:66
|
| 06 Apr 2024 02:36 AM |
|
Yeah that would have been cheaper, easier and more robust.
I wish I grabbed form a drain but I started right when the product was coming out and missed the opportunity.
Great suggestions. |
|
|
|
|