jeepster

Basic Member

Posts:153
 |
| 04 Jun 2011 09:11 AM |
|
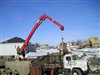
Last Thursday I poured my first ICF basement. This is my own house, so I get to live with any consequences. I'd say it went 85% OK. But honestly, I think it would have gone 95% OK if I didn't have the block rep that gave me crappy advice. I still have the next level to pour, and I don't think I'll invite him over.
Here is a list of things that didn't go so well:
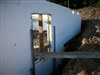
1. Many of my walls are bowed in. One is
bowed in up to one inch, and yes, it's the wall that everyone will see
pulling up to the house. My rep came and cranked in those braces way too much. The theory is that the wall will flex to the outside and it's hard to pull the wall back into alignment. I originally had the level bubble favoring the inside line, but he loosened up those braces and said it's easy to push the wall into alignment. The
wall obviously didn't move that much, if at all. The pump truck operator (who used to build ICF houses)
said they pull the walls in a max of 1/2 inch.
2. We waited way too long to adjust those braces. When that
concrete starts to sets up, it's next to impossible to make those walls
move. I figured if I'd get one wall to move, it would be a 28' wall
with 4 windows and a 6' door opening. All my braces did was bend the rebar stakes when I adjusted the turnbuckles . . . I
decided to make a potentially dangerous move and I hooked my truck up to
the top of the middle brace with a chain and pull. Letting the truck
pull downhill in neutral didn't make it budge. Putting it in 2wd and
giving incremental gas until the wheels spun didn't make it move.
Finally putting it in 4wd and spinning the wheels got me about 1/4" of
movement. Mind you this wall was the wall with by far the least amount
of concrete. Long and short, waiting until the end of a pour to true
the walls was horrible advice. I asked him after the first lift if
we should plumb the walls, and he said just wait until we are done,
that was VERY poor advice. It's going to be a lot of work to make siding look good on that wall.
3. He told me to not bother tap conning the braces to the footing. I did anyway, but on about 5 braces where I had to move them because of window strapping interference, I didn't bother re-tap conning. Not tap conning the bottom of the brace allowed the brace to move
up the wall while adjusting instead of hinging on the footing. You simply
cannot expect #10 screws anchored into plastic to hold the brace against
a wall that weighs at least 40,000lbs. This was only an issue with the
braces that I moved, but it was poor advice, none the less.
4. Putting the rebar in the corners for the wing walls after the
pour was complete. I got one piece of rebar in. The rest I'll have to
drill because the concrete was set up too firm.
5. Lift
heights. The pour was 10'6" The first lift went about 5'; the second lift went about 4'6", and the last lift went about 1'. I feel this
was responsible for a lot of bulges. The mix was obviously wet and
coupled with the vibrator and the height of the lift, I'll have more
rasping and trimming to do than I think I should have. If you're going around the wall three times, might as well make the lifts shorter to relieve some of the pressure, right?
6. I didn't have any blowouts, but I almost did. Once corner end joint broke out about 2", but it didn't spill any concrete. My rep told me to simply spray foam the bottom course to the footing and that would be enough to hold back the pressure. That might be true if we were pouring shorter lifts, but it obviously wasn't at the lift height we were pushing. If the corners are the most susceptible, then go ahead and screw 2x4s to the footing to hold the form.
Things that I will/would do different:
Mind you that my footings were spot on and my forms were high-end. The type that click together (trying no to drop brand names), so given a do-over:
Pre-pour:
-tap con braces to footing to prevent brace lift during adjustment
-if you have a large amount of fill that you are staking the braces too, either go down to virgin earth or pour mini- pads for your braces. This would help prevent your stakes from bending. I had about 6" of fill above the basement grade, and it allowed the rebar to bend when adjusting the turnbuckles. I don't think this would have mattered, because my walls were too set up anyway.
-Big one! Tilt the walls in no more than 1/2 inch.
During pour:
-monitor the movement after the first lift. If there was no change, then have someone start plumbing the walls while the concrete was still fluid, or at least split the difference.
- pour all the lifts 3-4 feet
- if you need rebar sticking out of the corners for wing walls, do it once the concrete stiffens, but don't wait until the end of the pour.
I didn't want to pour without the block rep on site, since I didn't have any experience at it. He reportedly had over 50 pours under his belt so I was really relying on his advice. I think If I went at it alone with the education learned here and the advice from the pump truck operator, I wouldn't be writing this email and I'd be sitting happy with a pour that went well.
|
|
|
|
|
|
|
BrucePolycrete

Advanced Member
Posts:524
|
| 04 Jun 2011 10:11 AM |
|
The problems that you have experienced here are all very common when building with ICFs that have plastic cross ties and no structural support inside the EPS panels.Because they market to DIY-ers and less experienced house builders, many ICF manufacturers and technical reps think that the American Concrete Institute rules for form design and lift heights do not apply to them - in fact, they may not even know the guidelines exist.
When deciding what height lift to pour, you have to know what lateral pressure your forming system is designed to handle. You should ask your ICF technical rep that question, and then check it against the ACI table that can be found here:
www.gatesconcreteforms.com/pdfs/pressureChart.pdf
Now, if your ICFs are designed to withstand 1,200 lbs per square foot, you can pour 10' at 70 degrees F, if they're designed to withstand 400 lbs, you better not pour more than 2' per hour.
You will also find that ICF systems that are designed to function at higher pressures are much less likely to move during the pour, and it is good advice to use a wood or metal track on the footing all around the wall to support the base of the form. Some ICF systems provide one, but we've seen "L" profiles designed for suspended ceilings used to good effect -- drywall corner bead is too whimpy.
Finally, if I were you, I'd call out that technical rep and make sure everyone in the world knows who he is and who he works for.
|
|
|
|
|
jonr

Senior Member
Posts:5341
|
| 04 Jun 2011 12:14 PM |
|
Is a retarder something that should be specified? Sounds like slower setting would have helped some.
Forgive the newbie question, but can one use cables for braces - ie, an anchor screwed into the ground, a cable up to the wall, and then a horizontal cable to the opposite wall and then another angled to the ground? Seems like they could be tightened up to prevent movement either way and pull downward on the blocks. |
|
|
|
|
Ray Gladstone

New Member
Posts:97
|
| 04 Jun 2011 01:52 PM |
|
Actually, a retarder is someone who would use cables to brace an ICF wall. Seriously, you need to get the bracing up when you reach 4 to 6 feet in height. If you tried to use cables, you would be constantly moving them. Also, proper bracing is only used on one side of the wall -- usually the inside. Your cable idea would have you on both sides messing with them all the time. Does not seem practical. |
|
|
|
|
eric monkman
Basic Member
Posts:262
|
| 04 Jun 2011 03:54 PM |
|
Nothing personal Jeepster, buy I can't fathom how you were let loose to pour your first wall,
without having been on a couple pours previously.
You were not set up for success.
My broken record tune is that all installers be certified or catagoried.
The Nudura Rep here would never allow your situation to occur, at the very least he would have
demanded that you employ a technical advisor to facilitate your pours and be onsite for them.
To Jonr, specifying a one hour retarder would have bought some time for sure.
Definitely a good call for newbie crews in hot weather. |
|
|
|
|
jeepster
Basic Member
Posts:153
|
| 04 Jun 2011 06:50 PM |
|
The Nudura Rep here would never allow your situation to occur, at the very least he would have
demanded that you employ a technical advisor to facilitate your pours and be onsite for them.
The rep was on site. He was the man with the plan. He was the one cranking my turnbuckles in. He was the one pumping 5+ feet into my walls. That was my technical advisor. I'm telling you, it would have turned out much better, or maybe even perfect, if it wasn't for him. I was mainly humping the vibrator and asking him questions because of my concerns. He didn't seem concerned . . . but of course he had to be somewhere and had to bail right after pouring. Oh, and I asked him to get me on at least one pour before mine. He never hooked me up. What area does your rep serve? I'm in southern Illinois. |
|
|
|
|
eric monkman
Basic Member
Posts:262
|
| 04 Jun 2011 09:26 PM |
|
Jeepster, I am sorry to hear that.
Did he do a pre-pour inspection and map out a pour strategy ?
A 5 ft lift is no biggie with Nudura or any 3rd generation block.
To me , your Rep seems to be in-experienced himself.
No pour is complete until all walls are straightened....... your guy should have stayed until clean-up time.
My Rep is Jim Ireton with Rideau Lumber, Smiths Falls Ontario.
He is an ICF pioneer in Eastern Ontario, ensures that all sites have "Certified Installers" either doing the work,
or retained astechnical advisors. Their certification must be attached to the sale of block, or it is a no go.
His high standards create happy customers and end users, something which Nudura can count on with Jim.
|
|
|
|
|
jeepster
Basic Member
Posts:153
|
| 04 Jun 2011 11:17 PM |
|
Posted By eric monkman on 04 Jun 2011 09:26 PM
Jeepster, I am sorry to hear that.
Did he do a pre-pour inspection and map out a pour strategy ?
He did go through the process. He arrived a few hours before the trucks came and we spent some time doing a few things, but nothing major regarding the block. He spent most of his time bending my rebar stakes over and tilting my walls in. He was convince that the walls would tilt out as the blocks were filled. I don't quite understand this theory, and he couldn't give me a reason, other than "there's no other way for the walls to go since the bracing is on the inside." He was worried that if they went out that at the angle I had the rebar stakes driven, that the brace would slide up the rebar as opposed to pulling the wall true. I've been disappointed since the day I received the blocks. I called and complained that it looked like these blocks were pulled from a swamp. Many of the blocks had corners cunked out of them. The driver who delivered the blocks would slam a few down, then walk on them while slamming the rest off the truck. At times I'd hear a "crack" and, of course, I would find them later as I was unwrapping the blocks. I was so pissed. I had little confidence in the block. I could tell that many of these packages were recycled from jobsites. Now I have to think about what to do on the next level. Do I continue the bow up to the truss line? This sounds like the most structurally sound thing to do. Do I continue the bow at the bottom of the next level and true it up at the roof truss line, and shim the siding/windows in between to make things look right? Do I cut the nubs off the top of the basement pour and square the next level up. Then I'll have to shim the ground level block to make my siding line up. On the bad wall there would be a 1" step in the concrete between the levels in the middle of the wall. This doesn't sound like a good idea. |
|
|
|
|
galore
New Member
Posts:40
|
| 04 Jun 2011 11:17 PM |
|
I know it totally sucks to have a less than ideal result when it comes to concrete. I had a similar problem with one of my basement walls that also bowed in by ~1 inch on the top because I also wanted the wall to "fall" into the interior bracing. In my case, I was the only one to blame which meant I could concentrate on a fix without getting mad at someone else. My solution was to straighten out the wall with 3" x 5" x 20 ft steel lintels. I snapped a straight line on top of the styrofoam, cut a groove with a chain saw, inserted the lintels (5" side), bolted them into the concrete with 1/2" tapcons and various stacks of washers as spacers (more in the middle where the max. bow was, none at the corners) and applied several coats of stucco to make a straight section where the wall was visible above ground. The wall looks totally straight now and it's impossible to see that the core has a bow. An another bonus is that the styrofoam is very well protected with the stucco and the steel on top. It may sound like a lot of work but it just took me a couple of hours to cosmetically straighten out a 32 foot long wall.   |
|
|
|
|
ICFHybrid

Veteran Member
Posts:3039
|
| 04 Jun 2011 11:48 PM |
|
Oh, and I asked him to get me on at least one pour before mine. He never hooked me up. I hope it's not too late to get on another (good) pour before you continue. |
|
|
|
|
Ray Gladstone
New Member
Posts:97
|
| 05 Jun 2011 12:06 AM |
|
Slightly off topic, but I am trying to figure out how to get a picture into a forum post. Can anyone offer the proceedure? |
|
|
|
|
dmaceld
Veteran Member
Posts:1465

|
| 05 Jun 2011 12:54 AM |
|
Posted By jeepster on 04 Jun 2011 11:17 PM
Now I have to think about what to do on the next level.
Do I continue the bow up to the truss line? This sounds like the most structurally sound thing to do.
Do I continue the bow at the bottom of the next level and true it up at the roof truss line, and shim the siding/windows in between to make things look right?
Do I cut the nubs off the top of the basement pour and square the next level up. Then I'll have to shim the ground level block to make my siding line up. On the bad wall there would be a 1" step in the concrete between the levels in the middle of the wall. This doesn't sound like a good idea.
I had a similar problem, albeit nowhere near as great, when I built my ICF house. There's some photos and discussion about how I straightened up a crooked wall at http://ownerbuilderbook.com/blogs/post.aspx?ID=2352. I don't know if you can use the same approach on your blocks or not. If you decide you want to try something like I did, and have questions, ask away. |
|
| Even a retired engineer can build a house successfully w/ GBT help! |
|
|
galnar
New Member
Posts:83
|
| 05 Jun 2011 01:44 AM |
|
Very sorry to hear about your difficulties. Concrete is unforgiving. I can't believe it was setting up on you that fast given that you poured it in three lifts. Could you please 'name names' either publicly in this thread or in a private message? I'm from IL as well and wondering how many scrubs are around here pimping ICFs.
|
|
|
|
|
peterswet
New Member
Posts:59
|
| 05 Jun 2011 08:28 AM |
|
Im not trying to be a wiseacre here jeepster but I have learned a long time ago that the "proffessionals and experts" are often not what they appear to be.
You obviously had misgivings and should have listened to your gut, I build with nudura and the mandatoy certification covered pouring in warm temps and warned that the walls should be plumbed during the pour to prevent exactly what has happened to you.
regards
P |
|
|
|
|
jonr
Senior Member
Posts:5341
|
| 05 Jun 2011 09:15 AM |
|
I agree, if someone isn't providing their "expertise" with a written warranty, then it might not be worth much. That includes Internet forums :-). But once you get multiple opinions and some supporting documentation, the risk goes down. |
|
|
|
|
TexasICF
Advanced Member
Posts:622

|
| 05 Jun 2011 09:17 AM |
|
Forensic analysis ;) Assuming the rep actually had 50 pours: I am going to say --- 1) He recently moved from somewhere north (cooler) to somewhere further south (warmer) and 2) he recently changed blocks from some other block to Nudura. Why? Because in cooler temps concrete might take a bit longer to set and be a lot more forgiving. In this neck of the woods you have to check the walls several times before, during and after the pour. If you wait you will be in trouble for sure. Nudura does not compress at all -- therefore leaning your bracing in doesn't do anything to help you. Some blocks compress on the side opposite the braces because the braces help support the wall on one side more than to opposite unbraced side. Screw position in slot is also part of this. You will find that some blocks make allowances for compression. I teach my installers to make no compression allowances and to leave the "free play" in the threads of the braces to the inside. That means that the wall is plumbed and should the wall move due to wind, internal vibration, etc. it can only fall the distance of the "free play" of the braces. THus, you have a plumbed wall with have no possible fall to the outside and a fraction of an inch possible fall to the inside. Tweaking the braces should always be in and around the "free play" of the threads. Brace manufacturers thread free play varies somewhat so you will need to become comfortable with your braces. Regards. |
|
|
|
|
eric monkman
Basic Member
Posts:262
|
| 05 Jun 2011 09:45 AM |
|
Good tips Texas.
I'm from the North and we often see 80 to 90 degree days in summer........ I'd say he embellished his cv substantially.
Check concrete setting by testing the "spill" that usually accompanies a wall pour. Give it a kick with your foot :-)
Remember where each load is placed.Know the batch time and the distance from the RM plant.
Are there trucks onsite waiting to unload, turning their barrels slowly in the hot sun?
Concrete 1 1/2 to 2 hrs old in warms temps is going off...unless you buy retarder.
The more info you have, the better decisions you will make.
If the concrete has "bite" don't wait to plumb up, get moving.
Wall belly's are often consequence of verts too far apart. 5 ft4in c to c is our limit.
If the belly is in, it might not come straight by adjusting the turnbuckle. Find some lumber, plywood etc and apply a strongback directly
onto the bow. She'll move if you get on it while the concrete is still plastic.
Jeepster, make the correction now instead of compounding your problem for another pour.Cut the nubs, do what ya gotta do.
Your next pour will be much better with your braces attached to solid decking.
Dmac gives thoughtful info.
|
|
|
|
|
eric monkman
Basic Member
Posts:262
|
| 05 Jun 2011 11:11 AM |
|
Posted By Ray Gladstone on 05 Jun 2011 12:06 AM
Slightly off topic, but I am trying to figure out how to get a picture into a forum post. Can anyone offer the proceedure? Ray, if you open a "photobucket" account and file your pics there, you can use the IMG code to copy and then paste to the thread. Sometimes the uploads go sideways and you have to start over...just be patient and experiment with it. :-) |
|
|
|
|
eric monkman
Basic Member
Posts:262
|
|
smartwall
Veteran Member
Posts:1209
|
| 05 Jun 2011 12:13 PM |
|
This is why I recomend Dur-o-wall for newbies as well as have a competent pro to run the pour. Pours should be 2 course lifts so you can get your sea legs. When I pour I start any aligment adjustment when I'm about 3/4's done. If somethings out of whack stop the pour. If you paid top price for a crappy product the that part is on your shoulders. When you saw that the product was crap ,send it back and if the supplier wouldn't give you first class product get another supplier or product. |
|
|
|
|